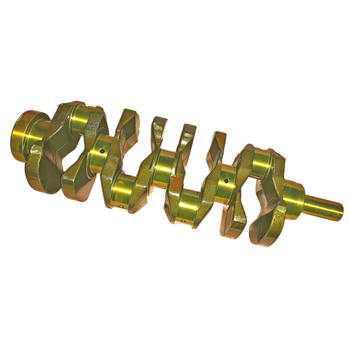
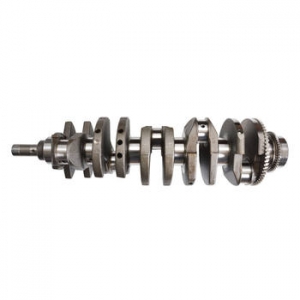
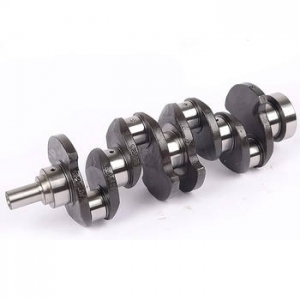
Understanding and correctly measuring crankshaft end play is absolutely fundamental for anyone serious about engine building, rebuilding, or even in-depth diagnostics. It’s one of those critical clearances that, if incorrect, can lead to a cascade of problems, ranging from subtle performance issues to, frankly speaking, catastrophic engine failure. Crankshaft end play refers specifically to the amount of axial movement the crankshaft is allowed along its rotational axis – essentially, how much it can slide back and forth within the engine block. This movement isn't arbitrary; it's carefully controlled, primarily by the thrust bearing. Think of the thrust bearing as the component designated to handle the fore-and-aft forces exerted on the crankshaft, particularly from clutch operation in manual transmissions or torque converter pressure in automatics. Why is measuring this tiny amount of movement so vital? Because too little end play means excessive friction and heat, potentially leading to bearing seizure, while too much allows the crankshaft to hammer back and forth, causing wear on bearings, journals, and potentially even damaging connecting rods or the block itself. Getting this measurement right isn't just good practice; it's essential for ensuring the engine operates smoothly, efficiently, and reliably for its intended lifespan. Have you ever stopped to consider how such a small clearance impacts the entire rotating assembly's harmony?
Understanding Crankshaft End Play in Detail
Let's delve a bit deeper into the mechanics and significance of crankshaft end play. As mentioned, it's the controlled axial float of the crankshaft. This movement is primarily managed by the thrust bearing, which typically consists of flanged half-shells located at one of the main bearing journals – often the center or rear main bearing, depending on the engine design. These flanges bear against machined surfaces on the crankshaft web or counterweight. The clearance between these bearing flanges and the crankshaft surfaces dictates the end play. It’s a delicate balance; there needs to be enough clearance to allow for a consistent oil film for lubrication and to accommodate thermal expansion as the engine reaches operating temperature, but not so much that excessive movement occurs. Consequences of improper end play are severe. Excessive end play, often caused by worn thrust bearing surfaces or a worn crankshaft thrust face, allows the crank to shift back and forth significantly. This can lead to a noticeable knocking sound, especially during clutch engagement/disengagement or changes in engine load. It can disrupt ignition timing if the sensor reads off the crank position, cause uneven wear on other main and rod bearings due to the misalignment, and in extreme cases, lead to connecting rods hitting the block or adjacent components. Conversely, insufficient end play is equally dangerous. This might result from using the wrong size thrust bearing, errors in machining the block or crank, or debris trapped during assembly. Tight clearance prevents an adequate oil film from forming, leading to metal-on-metal contact, rapid wear, extreme heat generation, and potential seizure of the crankshaft. It's worth noting that different engine designs and applications might have slightly different requirements, making adherence to manufacturer specifications absolutely critical.
Several factors can influence the actual crankshaft end play within an engine, extending beyond just the initial assembly. Naturally, wear and tear over many miles or hours of operation is a primary contributor to increased end play. The constant, albeit small, axial forces gradually erode the surfaces of the thrust bearing and the corresponding faces on the crankshaft. The rate of wear can be accelerated by factors like inadequate lubrication (low oil pressure, incorrect oil viscosity, or contaminated oil), excessive clutch pedal pressure in manual transmission vehicles, or issues with torque converter ballooning in automatics. Manufacturing tolerances also play a role; even new components have acceptable variations, and stacking these tolerances during assembly can sometimes push the end play towards the edge of the specification range. Importantly, incorrect assembly procedures are a common culprit for end play problems. Failing to properly clean components, installing the thrust bearing incorrectly (some are directional or need specific alignment), or improperly torquing the main bearing caps can all lead to either excessive or insufficient clearance. Thermal expansion is another consideration; clearances measured on a cold engine will change slightly as components heat up and expand. Engine designers account for this, which is why following the specified cold measurement procedure is crucial. Frankly speaking, overlooking any of these factors during an engine build or diagnostic check can lead to frustrating and costly issues down the road. Therefore, careful measurement isn't just about checking a number; it's about verifying the integrity of multiple interrelated components and processes.
Essential Tools for Accurate Measurement
Achieving an accurate crankshaft end play measurement hinges on using the right tools, and the undisputed star of this process is the dial indicator, typically paired with a magnetic base or clamp. A dial indicator is a precision instrument designed to measure small linear distances with high accuracy, often down to thousandths of an inch (or hundredths of a millimeter). For measuring end play, a plunger-style dial indicator is generally preferred. You'll need one with sufficient travel range to cover the expected end play plus a little extra. The magnetic base is essential for securely attaching the indicator to a stationary part of the engine block or bellhousing, ensuring that the measurement reflects only the crankshaft's movement and not any flex or movement of the measuring tool itself. The strength of the magnet is important; it needs to hold firm against the pressure required to move the crankshaft. Besides the dial indicator setup, you will need a method to gently lever the crankshaft back and forth axially. This is often done using a sturdy, blunt screwdriver or a specialized pry bar. It's absolutely critical to choose a prying point that won't damage any engine components. Common leverage points include prying carefully between a crankshaft counterweight and the engine block webbing, or sometimes against the flywheel/flexplate and the block, always using a block of wood or similar soft material to protect machined surfaces if necessary. Avoid prying against delicate parts like bearing caps or aluminum surfaces that could be easily gouged or cracked. Some technicians might mention using feeler gauges, but to be honest, while feeler gauges are great for measuring gaps, they are generally not the preferred or most accurate method for crankshaft end play due to the difficulty in getting a consistent feel and the potential for crankshaft rocking. Stick with the dial indicator for reliable results. Ensuring your tools are in good condition – a smooth-operating dial indicator, a strong magnet, and appropriate levers – is step one towards a successful measurement.
Step-by-Step Guide to Measuring End Play
Before you even think about positioning the dial indicator, proper preparation is key to getting an accurate crankshaft end play reading. Firstly, ensure the engine is positioned securely and you have adequate access to both the crankshaft (or flywheel/flexplate) and a solid mounting point on the block. Often, this measurement is taken during engine assembly when the crankshaft and main bearings (including the thrust bearing) are installed, but before the pistons and rods go in. However, it can sometimes be checked on a fully assembled engine, though this might require removing the oil pan for access or working from the flywheel end. Whichever scenario applies, the crankshaft must be free to move axially; ensure the main bearing caps are torqued to specification, as this properly seats the bearings, including the crucial thrust bearing. Cleanliness cannot be overstated. The surface where you intend to mount the magnetic base of the dial indicator must be perfectly clean and free of oil, grease, or debris to ensure a solid, immovable attachment. Likewise, the surface on the crankshaft that the dial indicator plunger will contact needs to be clean, flat, and perpendicular to the crankshaft's axis. A common contact point is the machined face of the flywheel mounting flange or the front snout of the crankshaft. Safety first, always – ensure the engine is stable and cannot rotate unexpectedly, especially if working underneath a vehicle.
With the preparation complete, the next stage is setting up the dial indicator correctly. Attach the magnetic base firmly to a rigid, non-moving part of the engine block or, if accessible, the bellhousing if it's bolted securely to the block. Position the dial indicator so that its plunger is aligned as closely as possible with the crankshaft's axis of rotation and is perpendicular to the surface it will contact on the crankshaft (e.g., the flywheel flange or crank snout face). This alignment is crucial; if the plunger contacts the crank at an angle, the measurement will be inaccurate due to geometric error, often referred to as cosine error. Gently adjust the indicator's position so the plunger is slightly depressed against the crankshaft surface – this is called "preloading" the indicator. Preloading ensures the plunger maintains contact throughout the measurement range and takes up any internal slack in the indicator's mechanism. Once preloaded, rotate the dial face to align the zero mark with the needle. Double-check that the magnetic base is secure and that neither the indicator nor its mounting arm flexes when moderate pressure is applied. Any movement in the setup itself will lead to erroneous readings, so take your time to ensure everything is rigid. Many experts agree that a stable setup is half the battle won when measuring end play.
Now comes the actual measurement process. Using your chosen pry bar or screwdriver, carefully apply gentle pressure to lever the crankshaft fully towards one end of its axial travel – let's say, towards the front of the engine. Apply force smoothly and avoid sudden jolts. Pry against a solid point on the block and crankshaft, protecting surfaces as needed. Observe the dial indicator; once the crankshaft stops moving, carefully re-zero the dial indicator (or note the reading if you prefer not to re-zero). Next, reverse the process: apply gentle pressure to lever the crankshaft fully in the opposite direction, towards the rear of the engine, until it stops again. Be consistent with your levering technique. The total distance the needle moves on the dial indicator from the fully forward position to the fully rearward position represents the crankshaft end play. For example, if you zeroed the indicator with the crank fully forward, the reading you see when it's pushed fully rearward is the total end play. It’s highly recommended to repeat this process two or three times to ensure consistency and verify your reading. If you get significantly different readings each time, re-check your dial indicator setup for stability and ensure the plunger is contacting a smooth, flat surface squarely. In my experience, slight inconsistencies can arise from the indicator tip catching on minor surface imperfections or slight rocking of the crankshaft if not pushed purely axially.
Interpreting Results and Understanding Specifications
Obtaining a measurement is only part of the task; the crucial next step is interpreting that number correctly. Every engine design has a specific crankshaft end play specification, usually expressed as a range (e.g., 0.004" - 0.008", or 0.10mm - 0.20mm). This specification is non-negotiable and can be found in the official factory service manual for the specific year, make, and model of the engine you are working on. Using generic specifications or numbers from a similar engine is risky, as design differences can lead to vastly different requirements. Once you have your measured end play value, compare it directly to the manufacturer's specified range. If your measurement falls comfortably within this range, congratulations – the end play is acceptable. However, if the measured value is outside the specified limits, either too loose (greater than the maximum allowed) or too tight (less than the minimum allowed), corrective action is necessary before proceeding with the engine assembly or putting the engine back into service. Ignoring out-of-spec end play is asking for trouble. It's worth noting that performance engine builds might sometimes aim for a specific part of the tolerance range (e.g., slightly looser for certain racing applications), but for stock or street performance engines, adhering strictly to the factory range is almost always the best approach for longevity and reliability. Why take the risk when the manufacturer has already determined the optimal clearance?
So, what happens if your measurement reveals excessive end play – meaning the crankshaft moves back and forth more than the manufacturer allows? This is a common issue, especially in higher-mileage engines or those subjected to heavy loads. The most frequent cause is wear on the thrust surfaces of the thrust bearing itself. Over time, these surfaces simply wear down, increasing the clearance. Another possibility is wear on the corresponding thrust face machined onto the crankshaft. Less commonly, but still possible, is wear or damage to the main bearing bore in the engine block where the thrust bearing resides, although this usually points to more severe engine problems. The consequences of excessive end play, as touched upon earlier, include potential knocking noises, accelerated wear on other bearings due to misalignment, possible oil pressure fluctuations, and in severe cases, physical contact between rotating and stationary components. The corrective action almost always involves replacing the thrust bearing. Standard replacement bearings are typically sufficient. However, if the crankshaft thrust face is also worn beyond limits, the crankshaft may need to be machined (if possible and within service limits) or replaced entirely. In some cases, oversized thrust bearings are available to compensate for minor crankshaft machining, but always verify compatibility and follow recommended procedures. Ignoring excessive end play essentially guarantees premature engine wear and potential failure.
On the flip side, what if the crankshaft end play measurement is too tight – below the minimum specified clearance? This scenario, while perhaps less common than excessive wear, is arguably more immediately dangerous. Insufficient clearance prevents the formation of a proper hydrodynamic oil film between the thrust surfaces. This leads to direct metal-on-metal contact, generating significant friction and heat. The consequences can be rapid and severe: accelerated wear of the thrust bearing and crankshaft, potential warping or distortion of components due to heat, and in the worst-case scenario, complete seizure of the crankshaft. Common causes for tight end play include installing the incorrect size or thickness of thrust bearing (replacement bearings sometimes come in standard and oversized options), errors during machining of the engine block main bearing housing or the crankshaft thrust surfaces, incorrect assembly (like installing a two-piece thrust bearing half backward), or even foreign debris becoming trapped between the thrust surfaces during assembly. Corrective action requires identifying the root cause. Double-check that the correct part number thrust bearing was installed. Inspect the bearing shells and crankshaft thrust faces for any burrs, debris, or damage. Measure the thickness of the thrust bearing shells if possible. If machining errors are suspected, the block or crankshaft may need to be re-measured and potentially re-machined by a competent machine shop. Our company provides high-precision engine components, including bearings manufactured to exacting tolerances, which can help eliminate component variation as a source of end play issues.
Common Mistakes and Best Practices
Even with the right tools, several common mistakes can creep into the process of measuring crankshaft end play, leading to inaccurate results and potentially incorrect diagnoses or assembly decisions. One frequent error is an improper dial indicator setup. Mounting the base on an unstable or slightly oily surface, allowing the mounting arm to flex, or positioning the plunger at an angle to the thrust surface are all recipes for bad readings. Remember, the measurement relies on rigidity. Another common pitfall is using excessive force when prying the crankshaft back and forth. You only need enough force to overcome the oil film resistance and gently seat the crank against the thrust bearing; using excessive force can flex the crankshaft or even distort the block slightly, artificially increasing the reading. Measuring against an inappropriate or uneven surface on the crankshaft is also problematic – always aim for a clean, flat, machined surface perpendicular to the crank axis. Misinterpreting the dial indicator reading itself can happen, especially with indicators having multiple revolutions or fine graduations. Always double-check your reading and ensure you understand the scale. Perhaps the most critical mistake, however, is failing to consult and adhere to the correct factory service manual for the specific engine being worked on. Relying on memory, online forums, or generic specs can lead to setting the clearance incorrectly for that particular application. Have you ever struggled with getting a perfectly stable dial indicator reading, only to find the magnetic base wasn't quite secure?
Conclusion: Ensuring Engine Longevity Through Accurate Measurement
In conclusion, accurately measuring crankshaft end play is far more than just a procedural step in engine assembly or diagnostics; it's a critical verification of the engine's internal health and a cornerstone of ensuring its long-term reliability and performance. This precise axial clearance, meticulously controlled by the thrust bearing, directly impacts lubrication, friction, wear rates, and the overall mechanical harmony of the rotating assembly. As we've explored, both excessive and insufficient end play carry significant risks, from performance degradation and annoying noises to catastrophic component failure. Therefore, mastering the technique – understanding the underlying principles, using the correct tools like a dial indicator properly, following a methodical step-by-step procedure, and critically comparing the results against the manufacturer's exact specifications – is indispensable for professional technicians and serious DIY engine builders alike. It’s a measurement that demands care and precision. Investing the time to get it right prevents costly comebacks and ensures the engine operates as designed. For those seeking the utmost precision and reliability, utilizing high-quality measurement tools and engine components, such as those offered by our company, provides added confidence in achieving the correct tolerances vital for engine longevity.
For more detailed information, please visit our official website: crankshaft end play


