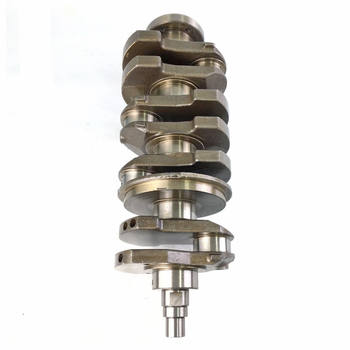
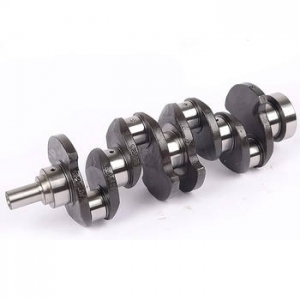
Getting crankshaft torque specifications absolutely right is not just a recommendation; it's arguably one of the most critical aspects of engine building and repair. Frankly speaking, the longevity, performance, and fundamental reliability of an internal combustion engine hinge significantly on the precise application of force when securing its core rotating components. We're talking about the main bearing caps holding the crankshaft in place and the connecting rod caps linking the pistons to the crank throws. These aren't just bolts being tightened; they are highly engineered fasteners designed to achieve a specific amount of clamping force when stretched to a predetermined level. This stretch, known as preload, ensures the joint remains tightly clamped under the immense and fluctuating loads experienced during engine operation – combustion pressure, inertial forces, and torsional vibrations. Simply making a bolt "tight" is a recipe for disaster. Too loose, and components can shift, bearings can fret or spin, and oil pressure can be lost. Too tight, and you risk yielding the bolt beyond its elastic limit, stripping threads, distorting bearing caps, or even causing the crankshaft to bind. Therefore, understanding and meticulously adhering to the correct torque specifications is the bedrock of a successful engine build, ensuring every component works in harmony as the manufacturer intended. It’s the difference between an engine that purrs reliably for years and one that suffers premature and often catastrophic failure.
Understanding Crankshaft Torque: Beyond Simple Tightness
So, what exactly is torque in this context, and why is a specific value so crucial? Torque, measured typically in Newton-meters (Nm) or foot-pounds (lb-ft), is a rotational force. When applied to a fastener like a main bearing cap bolt or a connecting rod bolt, its primary purpose is to stretch the bolt axially. Think of the bolt as a very stiff spring. This stretching action creates tension within the bolt, which translates directly into the clamping force holding the components together – the bearing cap against the engine block or the rod cap against the connecting rod body. It's this clamping force, not merely the tightness felt, that is the ultimate goal. The specified torque value is essentially an indirect, practical way to achieve the desired bolt stretch and, consequently, the correct preload. Why is this preload so vital? It ensures that even under the maximum dynamic loads the engine experiences, the joint surfaces never separate. Separation, even momentarily, allows for micro-movements, leading to wear, fretting corrosion, loss of bearing crush (the slight interference fit that secures the bearing shells), and ultimately, failure. It's worth noting that a significant portion of the applied torque (often 80-90%) is actually used just to overcome friction – friction under the bolt head and friction in the threads. This leaves only a small percentage to actually stretch the bolt. This highlights why factors like lubrication and thread condition dramatically affect the relationship between applied torque and achieved clamping force, a point we'll delve into later. Getting this delicate balance right is fundamental to securing the heart of the engine.
The Critical Dangers of Incorrect Torque Application
Applying the incorrect torque to crankshaft fasteners is playing with fire, leading down two dangerous paths: under-torquing and over-torquing. Neither leads to a happy engine. Under-torquing might seem less immediately damaging, but its consequences are insidious and equally severe over time. When bolts lack sufficient preload, they can gradually loosen under vibration and load cycling. This allows relative movement between the bearing cap and the block or saddle. This movement, known as fretting, can wear away material, leading to a loss of bearing crush and potentially allowing the bearing shells to spin within their bore – a catastrophic failure often requiring major engine repair or replacement. Furthermore, loose caps can compromise the structural integrity of the engine's bottom end, affect oil pressure delivery to critical components, and lead to knocking noises. Have you ever wondered what causes that dreaded rod knock? Improperly torqued rod bolts are a common culprit. The constant pounding of combustion forces against insufficiently clamped rod caps can fatigue the bolts, leading to eventual breakage and destructive engine failure. It's a scenario no mechanic or engine owner ever wants to face, underscoring the need for precision from the outset.
Consequences of Over-Torquing
On the flip side, the temptation to add "a little extra for good measure" when torquing critical fasteners is equally perilous. Over-torquing pushes the fastener beyond its designed elastic limit, potentially stretching it permanently (yielding) or even causing it to fracture during tightening or later under load. A yielded bolt loses its ability to maintain the intended clamping force, effectively becoming as useless as an under-torqued one, but with the added risk of sudden failure. Beyond damaging the bolt itself, excessive torque can wreak havoc on the components being clamped. Over-tightening main bearing caps or connecting rod caps can distort their shape. Since bearing clearances are measured in thousandths of an inch (or hundredths of a millimeter), even slight distortion can reduce or eliminate the critical oil film gap between the bearing and the crankshaft journal. This leads to increased friction, overheating, and rapid bearing wear, potentially causing the bearing to seize onto the crankshaft. Imagine the crankshaft suddenly locking up while the engine is running – the damage can be extensive. Furthermore, the extreme force can damage the threads in the engine block or connecting rod, requiring difficult and expensive repairs like thread inserts (e.g., Heli-Coils) or even component replacement. Getting the torque specification right isn't just about hitting a number; it's about respecting the engineering limits of every part involved.
Key Factors That Influence Torque Readings and Results
Achieving the correct clamping force isn't solely dependent on hitting the target number on the torque wrench. Several crucial factors significantly influence the relationship between the applied torque and the resulting bolt stretch or preload. Perhaps the most significant is lubrication. Whether the manufacturer specifies installing bolts dry, with engine oil, or with a specialized assembly lubricant (like molybdenum disulfide or "moly" lube) makes a massive difference. Lubricants dramatically reduce friction under the bolt head and in the threads. Because less torque is wasted overcoming friction, more of the applied torque goes directly into stretching the bolt. Using the wrong lubricant – or no lubricant when one is specified, or oil when moly is required – will result in vastly different clamping forces for the same torque reading. Using moly lube where oil is specified, for instance, can lead to significant over-stretching and potential bolt failure even at the "correct" torque value. Similarly, thread condition is paramount. Clean, undamaged threads are essential for consistent results. Dirty, rusty, or damaged threads increase friction unpredictably, meaning much of the applied torque is consumed just fighting the resistance, leading to insufficient preload even if the wrench clicks at the right number. This is why meticulously cleaning bolt and block threads (using thread chasers, not taps which can remove material) is a non-negotiable step. Bolt material and grade also play a role, as stronger bolts require higher torque values to achieve the necessary stretch. Even ambient temperature can have a minor effect. Understanding these variables is key to interpreting torque specifications correctly and applying them effectively.
Finding Accurate Specifications: Trust the Source
Given the criticality of precise torque, where should one find the definitive specifications? The answer is unequivocal: the OEM service manual for the specific year, make, and model of the engine being worked on is the gold standard. Manufacturers spend considerable resources determining the exact torque values, tightening sequences, and lubricant requirements needed for reliable assembly of their engines. These specifications are based on extensive testing and engineering calculations specific to the materials, fastener designs, and operating loads of that particular engine. Relying on generic torque charts found online, asking on forums, or guessing based on bolt size is incredibly risky. Engine designs vary significantly, even between different versions of the same base engine or across model years. What's correct for one might be dangerously wrong for another. It's worth noting that if aftermarket components are being used, particularly high-performance fasteners like those from ARP (Automotive Racing Products), it is absolutely essential to use the specifications provided by the *fastener manufacturer*, not the OEM specs. These bolts are often made from different materials with higher tensile strengths and may require different lubricants (often their proprietary assembly lube) and torque values or even torque-plus-angle procedures to achieve the correct preload. In my experience, double-checking and cross-referencing specifications, especially when mixing stock and aftermarket parts, is time well spent. Always prioritize the most specific and authoritative source available for the components you are actually using.
Torque-to-Yield (TTY) Bolts: A Unique Tightening Strategy
In many modern engines, engineers utilize a different type of fastener known as Torque-to-Yield (TTY) bolts, particularly for critical applications like cylinder heads and sometimes main bearing caps or connecting rods. Understanding these is crucial as their tightening procedure and properties differ significantly from conventional bolts. TTY bolts are designed to be tightened beyond their elastic limit and into their plastic deformation range. Why is this approach so effective? When a bolt is stretched into its yield zone, it provides a very consistent and high level of clamping force, largely independent of the friction variations that can affect conventional torque methods. The tightening procedure typically involves applying an initial seating torque (a relatively low value) and then turning the bolt through a specified additional angle (e.g., 90 degrees or 120 degrees), often in multiple stages. This angle ensures the bolt is stretched by the precise amount required to reach its yield point and achieve the target clamping force. The critical takeaway for TTY bolts is that they are strictly single-use items. Once stretched into the plastic range, they are permanently deformed and will not provide the correct clamping force if reused. Attempting to retighten a used TTY bolt can lead to it breaking during installation or, worse, failing under load in the running engine. Always replace TTY bolts with new ones as specified by the manufacturer – it’s non-negotiable for a safe and reliable assembly.
Essential Tools and Techniques for Precision Torquing
Achieving accurate crankshaft torque relies heavily on using the right tools and employing meticulous techniques. The cornerstone tool is, of course, the torque wrench. Several types exist, including beam-style, click-type, and digital electronic wrenches. While beam wrenches are simple and reliable if read correctly, click-type are very common, offering tactile and audible feedback when the preset torque is reached. Digital wrenches offer high precision and often include angle measurement capabilities, essential for TTY bolts. Regardless of the type, regular calibration is absolutely vital. A torque wrench that reads inaccurately is worse than useless; it provides a false sense of security. How often should calibration occur? Many experts recommend annual calibration or more frequently with heavy use. Proper technique is also crucial: apply force smoothly and steadily to the handle grip, stopping immediately when the wrench indicates the target torque is reached. Avoid jerky movements or using extensions that aren't accounted for in the calibration. Beyond the wrench itself, proper preparation is key. This involves thorough cleaning of all threads – both the bolt threads and the threaded holes in the block or connecting rod. Use a quality solvent and brushes, and consider using thread chasers (specifically designed to clean and reform threads, not cut new ones like a tap) to ensure they are free of debris, old sealant, or rust. Finally, always apply the specified lubricant (oil, moly lube, or assembly grease) correctly – typically under the bolt head and on the threads – as this drastically affects the friction and thus the actual preload achieved at a given torque reading. Skipping these steps undermines the entire process.
The Importance of Sequence and Staging
Tightening crankshaft main bearing caps and connecting rod caps isn't just about applying the final torque value; the *way* you get there is equally important. Manufacturers specify a precise tightening sequence and often multiple torque stages for a reason. The sequence, typically starting from the center bolts and working outwards in a specific pattern, ensures that the cap is drawn down evenly onto the block or rod. Tightening bolts randomly or only on one side first can cause the cap to tilt or bind, leading to uneven clamping pressure, potential component distortion, and inaccurate final torque readings. Think of it like tightening the lug nuts on a car wheel – you always follow a star pattern to ensure the wheel seats flat against the hub. Similarly, torque is usually applied in stages. For example, the procedure might specify tightening all bolts in sequence to 30 Nm, then repeating the sequence at 60 Nm, and finally completing the sequence at the final target torque of 90 Nm (these are just illustrative values). This multi-stage approach gradually applies the clamping force, allowing the components to settle properly and ensuring a more uniform final load distribution across all fasteners and the mating surfaces. For TTY bolts, the staging often involves an initial torque followed by specific angle rotations. Ignoring the specified sequence and stages is a common mistake that can compromise the integrity of the assembly, even if the final torque value is eventually reached on the wrench. Meticulous adherence to the manufacturer's procedure is paramount for getting it right.
Practical Application: Main and Connecting Rod Bearings
Let's visualize applying these principles to installing main bearings. After ensuring the crankshaft journals and block saddles are immaculately clean and measured, the upper bearing shells are placed in the block. The crankshaft is carefully lowered into place. The lower bearing shells are installed in the main caps. Crucially, the specified lubricant (often engine oil) is applied to the bearing surfaces. Now, attention turns to the fasteners. The threads in the block and the main cap bolts must be perfectly clean. Following the manufacturer's recommendation, the appropriate lubricant (which might be different from the bearing lubricant – perhaps moly lube on threads and under bolt heads) is applied. The main caps are installed in their correct positions and orientations. Then, using a calibrated torque wrench, the bolts are tightened in the specified sequence (e.g., starting with the center main cap, tightening its bolts in stages, then moving outwards) and steps (e.g., Step 1: 25 lb-ft, Step 2: 50 lb-ft, Step 3: 80 lb-ft). After each cap is fully torqued, it's wise to check if the crankshaft still rotates freely by hand. Any binding indicates a problem – perhaps a distorted cap, incorrect bearing size, or debris – that must be addressed immediately. A similar meticulous process applies to connecting rod bolts, which are often even more critical due to the high dynamic loads they endure. Proper lubrication, adherence to sequence and stages (often including angle torquing for TTY or high-performance bolts), and verifying rod movement on the journal after tightening are essential steps. Our company understands the importance of precision here, which is why our related products, like precision-machined engine components or high-quality fastener kits, are designed to meet stringent tolerances, providing a reliable foundation for accurate assembly.
Common Mistakes and Critical Avoidance Strategies
Despite the importance, several common mistakes frequently sabotage efforts to achieve correct crankshaft torque. One of the most prevalent is using the wrong lubricant or applying it incorrectly. As discussed, friction consumes a huge portion of applied torque, and lubrication type dictates how much. Using engine oil when moly lube is specified, or vice versa, or applying lube inconsistently will lead to incorrect bolt stretch and clamping force. Always follow the manual precisely. Another frequent error is neglecting thread condition. Dirty, damaged, or rusty threads create excessive friction, leading to under-tightening even when the wrench clicks. Thorough cleaning and inspection of all threads (male and female) is non-negotiable. Using an uncalibrated torque wrench is another major pitfall – it provides dangerously misleading information. Have you ever wondered if that old torque wrench in your toolbox is still accurate? It's worth getting it checked. Ignoring the specified tightening sequence and stages is also common, leading to uneven loading and potential distortion. Rushing the job, especially reusing TTY bolts or fasteners that show signs of damage or stretching, is asking for trouble. Lastly, relying on guesswork, memory, or generic specifications instead of consulting the authoritative service manual for the specific engine is perhaps the most fundamental error. Avoiding these mistakes requires discipline, attention to detail, and a commitment to following the correct procedures meticulously, every single time.
Conclusion: Getting Crankshaft Torque Right - The Engine's Lifeline
In the intricate dance of components within an internal combustion engine, achieving the correct crankshaft torque specifications stands out as a fundamental requirement for reliability and performance. It's far more than just making bolts tight; it's about precisely controlling the clamping force that holds the engine's rotating assembly together under extreme conditions. As we've explored, getting this wrong – whether through under-torquing or over-torquing – inevitably leads to problems, ranging from subtle performance degradation and oil consumption to catastrophic failures like spun bearings or broken connecting rods. Success hinges on a combination of factors: sourcing the correct, specific torque values and procedures from the manufacturer's service manual (or component supplier for aftermarket parts), using a properly calibrated torque wrench, meticulously preparing threads, applying the specified lubricant correctly, and diligently following the prescribed tightening sequences and stages. Understanding the "why" behind TTY bolts and their single-use nature is also critical. Ultimately, "Getting It Right" requires patience, precision, and an appreciation for the engineering principles at play. It’s the foundation upon which engine longevity is built, ensuring the heart of the machine beats strongly and reliably for its intended lifespan. When combined with quality components, like those our company strives to provide, meticulous attention to torque specifications ensures optimal performance and peace of mind.
For more detailed information, please visit our official website: Crankshaft Torque


