")
Embarking on a Toyota engine crankshaft replacement is no small feat, but for the seasoned DIY enthusiast or the budget-conscious car owner, it can be a rewarding endeavor. The crankshaft, often referred to as the backbone of your engine, is responsible for converting the linear motion of the pistons into rotational motion, ultimately powering your wheels. When this critical component fails, the symptoms can range from subtle noises to complete engine failure. This comprehensive guide aims to equip you with the knowledge and confidence to tackle this challenging repair in your own garage. However, it's crucial to understand upfront that crankshaft replacement is an advanced automotive repair demanding a significant level of mechanical skill, patience, and the right tools. Proceed with caution and always prioritize safety. If at any point you feel overwhelmed or unsure, consulting a professional mechanic is always the wisest course of action. This guide is designed to be thorough, but it cannot replace professional training and experience.
Understanding the Crankshaft and Its Importance
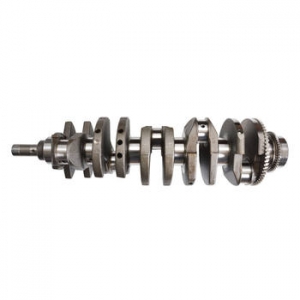
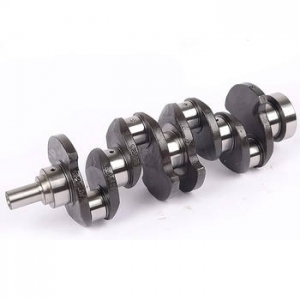
Before diving into the intricacies of replacement, it’s essential to fully grasp the crankshaft’s role within your Toyota engine. Imagine a meticulously choreographed dance of pistons moving up and down within their cylinders. The crankshaft is the conductor of this performance, translating the reciprocating motion of these pistons into the rotational force that ultimately drives your vehicle. It’s a robust component, typically forged from steel or cast iron, designed to withstand immense forces and constant stress. Its journals, precisely machined surfaces, ride on main bearings, allowing for smooth and efficient rotation. The connecting rods, linking pistons to the crankshaft, transfer power through precisely engineered throws or cranks. A healthy crankshaft ensures smooth engine operation, optimal power delivery, and longevity. Conversely, a damaged or worn crankshaft can lead to catastrophic engine failure, making understanding its importance paramount. Ignoring early warning signs can lead to more extensive and costly repairs down the line, potentially even requiring a complete engine replacement, which is a scenario anyone would want to avoid.
Recognizing the Symptoms of a Failing Crankshaft
Detecting a crankshaft issue early can be the difference between a manageable repair and a major engine overhaul. Listen closely to your Toyota engine; it often speaks volumes about its internal health. One of the most common indicators is a deep knocking or rumbling sound emanating from within the engine, particularly noticeable at lower RPMs or when idling. This could be a sign of worn main bearings or crankshaft journals, leading to excessive play and noise. Another symptom to watch for is increased engine vibration. While engines naturally vibrate, a significant increase or unusual pattern of vibration could point to crankshaft imbalance or damage. Keep an eye on your oil pressure gauge too. Lower than normal oil pressure can sometimes be attributed to worn main bearings supporting the crankshaft, as increased clearance allows oil to escape more readily, reducing overall system pressure. Furthermore, metallic debris in your engine oil during an oil change is a serious red flag. This "glitter" in the oil could be fragments of bearing material or even crankshaft material itself, signaling internal wear and potential failure. If you observe any of these symptoms, prompt investigation is crucial.
Tools and Materials: Preparing for the DIY Crankshaft Replacement
Successfully undertaking a DIY crankshaft replacement hinges heavily on proper preparation, and that starts with assembling the right tools and materials. This isn't a repair you can tackle with a basic socket set; specialized tools are essential. You'll definitely need a comprehensive engine rebuilding tool kit, including torque wrenches capable of handling both low and high torque values, piston ring compressors, bearing drivers, and precision measuring instruments like micrometers and dial indicators. An engine hoist and engine stand are indispensable for safely removing and working on the engine outside of the vehicle. Don’t forget safety gear – eye protection, gloves, and sturdy work boots are non-negotiable. Beyond tools, you'll need replacement parts, obviously including a new crankshaft, but also consider new main bearings, connecting rod bearings, piston rings, oil pump, timing belt or chain, and all necessary gaskets and seals. It's often wise to replace these components as a matter of preventative maintenance while the engine is disassembled. Consult your Toyota repair manual for specific torque specifications, parts numbers, and recommended procedures for your engine model. Having everything laid out and organized before you begin will streamline the process and minimize frustration during this complex repair.
Step-by-Step Guide: The Crankshaft Replacement Process (Overview)
While a detailed, step-by-step guide would be excessively long and engine-specific, let's outline the general process of a Toyota engine crankshaft replacement to give you a roadmap. First and foremost, disconnect the battery and drain all engine fluids (oil, coolant). Next, systematically remove all external engine components: intake manifold, exhaust manifolds, alternator, power steering pump, air conditioning compressor, and any other accessories. Then, carefully detach the transmission from the engine. Using the engine hoist, lift the engine out of the engine bay and mount it securely onto the engine stand. Now begins the engine disassembly. Remove the valve cover(s), cylinder head(s), oil pan, and timing cover. Detach the connecting rods from the crankshaft, ensuring you mark their positions and orientation for reassembly. Remove the pistons and cylinder sleeves if necessary (depending on your engine type and condition). Finally, unbolt and remove the main bearing caps, and carefully lift out the old crankshaft. Before installing the new crankshaft, meticulously clean all engine components and inspect them for wear or damage. Install new main bearings, lubricate them generously, and carefully position the new crankshaft. Reinstall the main bearing caps and torque them to the manufacturer's specifications. Reassemble the engine in reverse order, paying close attention to torque specifications, timing marks, and proper component orientation. This is a highly simplified overview; each step involves numerous sub-steps and critical details, emphasizing the complexity of this task.
Critical Considerations and Potential Pitfalls
Crankshaft replacement is fraught with potential pitfalls for the uninitiated DIYer. One major hurdle is precision. Engine components, particularly bearings and journals, are manufactured to extremely tight tolerances, often measured in thousandths of an inch. Incorrect bearing clearances or improper torqueing of bolts can lead to premature engine failure. Another critical aspect is cleanliness. Engine assembly must be performed in a meticulously clean environment. Even minute particles of dirt or debris can cause significant damage. Timing is also paramount. Ensuring the engine timing is correctly set during reassembly is crucial for proper engine operation and to prevent catastrophic valve-to-piston contact. Incorrect timing can lead to a non-starting engine or, worse, severe engine damage. Furthermore, diagnosing the root cause of the original crankshaft failure is essential. Simply replacing the crankshaft without addressing underlying issues like oil starvation or excessive engine load will likely lead to repeat failure. Thorough inspection and diagnosis are as important as the replacement itself. It's worth noting that some Toyota engines are inherently more complex than others, and certain models may require specialized tools or procedures not readily available to the average DIY mechanic.
When to Seek Professional Help: Recognizing Your Limits
While the allure of saving money and the satisfaction of DIY are strong motivators, knowing when to call in professional help is a sign of wisdom, not weakness. Crankshaft replacement is undeniably an advanced repair, and honestly, it's not for everyone. If you're hesitant about any stage of the process, particularly engine disassembly, precision measurements, or timing adjustments, it's prudent to consult a qualified mechanic. If you lack access to the specialized tools required, or if you've never tackled a major engine repair before, outsourcing this job is likely the safer and ultimately more cost-effective option. Engine damage resulting from improper crankshaft replacement can be far more expensive than the labor cost of a professional mechanic. Consider your own skill level and comfort zone honestly. Are you truly prepared to spend potentially days or weeks working on this complex project? Do you have a reliable backup vehicle in case the repair takes longer than anticipated? Sometimes, the peace of mind and guarantee of a professional repair outweigh the perceived savings of DIY. A reputable mechanic will have the experience, tools, and diagnostic equipment to perform the job correctly and efficiently, often with a warranty on their work.
Our Products and Services: Supporting Your Engine Rebuild Journey
Whether you decide to tackle the crankshaft replacement yourself or entrust it to a professional, our company is here to support your engine rebuild journey. We offer a comprehensive range of high-quality engine components, including crankshafts, bearings, pistons, rings, gaskets, and seals, specifically designed for Toyota engines. Our parts are manufactured to meet or exceed OEM specifications, ensuring durability and reliable performance. We understand the importance of precision and quality in engine rebuilding, and we are committed to providing parts you can trust. Beyond components, we also offer technical resources and support to DIY mechanics. While we don't provide step-by-step repair manuals directly, our knowledgeable team can offer guidance on part selection, compatibility, and general engine rebuilding best practices. We believe in empowering our customers with the right parts and information to get the job done correctly. For those opting for professional repair, our parts are also a preferred choice for many reputable mechanics who value quality and reliability. By choosing our products, you’re investing in the longevity and performance of your Toyota engine, regardless of who performs the actual repair. We strive to be your trusted partner in keeping your Toyota running smoothly for years to come.
Conclusion: Crankshaft Replacement – A Challenging but Achievable DIY Project
Toyota engine crankshaft replacement is undoubtedly a significant undertaking, demanding a blend of mechanical expertise, meticulous preparation, and the right resources. This complete DIY guide has aimed to illuminate the complexities involved, from understanding the crankshaft's critical role to recognizing symptoms of failure, preparing with the necessary tools, and outlining the general replacement process. While achievable for experienced DIYers with the proper skillset and equipment, it's crucial to approach this repair with realistic expectations and a healthy respect for the intricate nature of engine mechanics. Remember to prioritize safety, cleanliness, and precision at every step. When in doubt, seeking professional assistance is always a prudent decision. Ultimately, whether you choose to tackle this challenge yourself or rely on a mechanic, ensuring your Toyota's crankshaft is in optimal condition is vital for engine health and vehicle reliability. With the right knowledge, preparation, and support, keeping your Toyota on the road remains within reach. And remember, for quality Toyota engine parts to support your repair, look no further than our extensive catalog.
For more detailed information, please visit our official website: Toyota crankshaft replacement