")
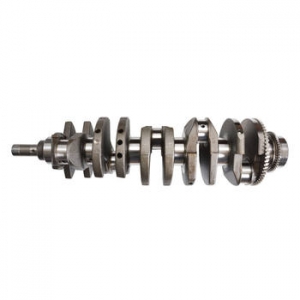
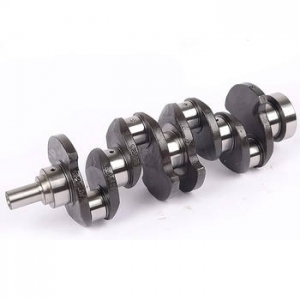
The crankshaft, at the very heart of any combustion engine, is undeniably one of its most critical components. It's responsible for converting the linear motion of pistons into rotational motion, which ultimately powers your vehicle. A properly installed crankshaft is paramount for engine longevity, performance, and overall reliability. Conversely, improper installation can lead to a cascade of potentially catastrophic engine problems down the line, ranging from premature wear and tear to complete engine failure. Therefore, understanding and meticulously following the correct installation procedures is not just good practice; it's an absolute necessity for any mechanic, whether seasoned professional or dedicated DIY enthusiast. This guide aims to demystify the process, providing a comprehensive, step-by-step approach to crankshaft installation, specifically focusing on preventing future engine woes and ensuring smooth, dependable operation for years to come. We'll delve into each stage of the process, from initial preparation to final checks, highlighting crucial details that often get overlooked but are vital for a successful and trouble-free installation.
Preparation is Paramount: Setting the Stage for Success
Before you even think about touching the crankshaft itself, meticulous preparation is absolutely essential. Think of it as laying the foundation for a building; if the foundation is flawed, the entire structure is at risk. This preparatory phase involves several key steps, starting with ensuring a clean and organized workspace. Dirt, debris, and stray tools are the enemies of precision engine work. Thoroughly clean your work area and ensure you have ample space to maneuver. Next, meticulously clean all engine components that will interact with the crankshaft, including the engine block's main bearing journals and the main bearing caps. Use appropriate cleaning solvents and lint-free cloths to remove any old oil, grime, or gasket material. Following cleaning, a detailed inspection is crucial. Carefully examine the crankshaft main bearing journals and the corresponding journals in the engine block for any signs of wear, damage, or imperfections. Look for scratches, scoring, or any irregularities that could compromise bearing surface contact. Similarly, inspect the main bearings themselves for wear or damage. If any component shows signs of significant wear or damage, replacement is non-negotiable. Ignoring these initial steps is a gamble that could lead to significant engine problems shortly after reassembly, making thorough preparation an investment in long-term engine health.
Bearing Selection and Precision Installation: The Foundation of Smooth Rotation
The main bearings are the unsung heroes in crankshaft installation, providing a critical interface between the crankshaft and the engine block. Selecting the correct bearings is not a matter of guesswork; it's a process that often involves precise measurements and adherence to manufacturer specifications. Engine manufacturers typically specify bearing clearances, which are the minute gaps between the crankshaft journals and the bearings. These clearances are critical for proper lubrication and preventing metal-to-metal contact. Consult your engine's service manual for the correct bearing clearance specifications and the appropriate bearing selection procedure. This often involves using Plastigauge, a crushable plastic thread, to measure clearances after installation. Before installing the bearings, ensure they are perfectly clean and free of any debris. Lightly lubricate the backs of the bearings and the bearing journals in the engine block with assembly lube or clean engine oil. Carefully position the bearings into their respective locations in the block and main caps, ensuring they are seated properly and oriented correctly. It’s worth noting that bearings often have locating tangs or markings that must align correctly with the block and caps. Improper bearing selection or installation can lead to insufficient or excessive bearing clearance, resulting in oil starvation, overheating, and ultimately, bearing failure and crankshaft damage. Therefore, precision and adherence to specifications are paramount in this stage.
Lubrication is Life: Pre-Oiling for Initial Protection
Before you even think about lowering the crankshaft into place, lubrication is absolutely key. Think of it as giving the crankshaft a head start in its life within the engine. The initial moments after engine start-up are critical, as it takes a short time for the oil pump to fully circulate oil throughout the engine. Pre-lubricating the crankshaft bearings and journals minimizes friction and wear during this crucial initial period. Apply a generous amount of high-quality engine assembly lubricant or clean engine oil to the bearing surfaces of both the main bearings in the block and the crankshaft journals. Ensure that all bearing surfaces are thoroughly coated. This pre-lubrication creates a protective film that will significantly reduce friction during the initial engine rotation, preventing scuffing and wear before the engine's oil pump can establish full lubrication pressure. This step is especially critical in rebuilt engines or engines that have been sitting for extended periods, as the oil film on internal components may have deteriorated. Skipping this seemingly minor step can dramatically increase the risk of premature bearing wear and crankshaft damage, highlighting the importance of pre-lubrication as a preventative measure. It's a simple act that pays significant dividends in terms of engine longevity and reliability.
Gentle Placement and Initial Seating: Avoiding Damage from the Start
With the bearings lubricated and ready, the next step is the delicate task of placing the crankshaft into the engine block. This is not a moment for brute force; finesse and careful handling are essential. Grip the crankshaft securely, using clean hands or gloves to avoid transferring any contaminants. Carefully lower the crankshaft into the engine block, aligning it with the main bearing journals. Ensure that the crankshaft is seated gently and squarely into the bearings. Avoid forcing or dropping the crankshaft, as this could damage the bearings or the crankshaft journals themselves. If you encounter any resistance, stop and re-check the alignment. Binding or resistance at this stage usually indicates a misalignment issue or a bearing that is not properly seated. Once the crankshaft is seated, rotate it gently by hand to ensure it turns freely without any binding or tight spots. This initial rotation is a preliminary check for proper bearing installation and crankshaft alignment. If the crankshaft rotates smoothly and freely, it indicates that the placement has been successful. If you encounter any binding or resistance, immediately investigate the cause before proceeding further. Forcing a binding crankshaft can lead to severe damage to bearings and journals, negating all the careful preparation done up to this point.
Main Cap Installation and Torqueing: Achieving Proper Clamp Load
With the crankshaft gently seated in the block, the next critical phase is installing the main bearing caps. These caps secure the crankshaft in place and apply the necessary clamp load to the main bearings. Before installing the caps, ensure they are clean and properly oriented. Main caps are typically numbered and must be installed in their correct positions and orientations; attempting to install them incorrectly can cause serious damage. Lightly lubricate the threads of the main cap bolts with engine oil or thread lubricant to ensure accurate torque readings. Install the main caps and hand-tighten the bolts initially, ensuring they are snug but not overly tight. The next crucial step is torqueing the main cap bolts to the manufacturer's specified torque values and sequence. This is not a step to be taken lightly; incorrect torque can lead to bearing distortion, crankshaft flex, and ultimately, engine failure. Consult your engine's service manual for the precise torque specifications and torque sequence. Typically, main cap bolts are torqued in multiple stages, gradually increasing the torque to the final specified value. Using a calibrated torque wrench is absolutely essential to ensure accurate torque application. Following the correct torque sequence ensures even distribution of clamp load across the main bearings, preventing distortion and ensuring proper crankshaft support and rotation.
Verification of Smooth Rotation: The Post-Torque Test
After torqueing the main cap bolts to specification, it's imperative to re-verify the crankshaft's rotation. This step confirms that the torqueing process has not introduced any binding or distortion. Attempt to rotate the crankshaft by hand once again. It should still rotate smoothly and freely, just as it did before torqueing. If you notice any increase in resistance or binding after torqueing, this is a red flag indicating a potential problem. Binding after torqueing can be caused by several factors, including incorrect bearing clearance, distorted bearings due to over-torqueing, or debris trapped between the bearing surfaces. If binding is detected, you must investigate the cause immediately. Do not attempt to force the crankshaft to rotate, as this could exacerbate the problem. Start by loosening the main cap bolts in the reverse of the torque sequence and re-check the rotation. If the crankshaft rotates freely after loosening, it suggests that the issue is related to the torqueing process or bearing clearance. Re-torque the bolts carefully, ensuring you are following the correct sequence and torque values. If the binding persists even after loosening the bolts, it may indicate a more serious issue, such as incorrect bearing selection or damage to bearing surfaces, requiring further investigation and potentially component removal and inspection. A smooth, free-rotating crankshaft after torqueing is a critical confirmation of a successful installation.
Sealing and Final Touches: Preventing Leaks and Ensuring Longevity
With the crankshaft properly installed and rotating smoothly, the next steps focus on sealing and completing the assembly. Crankshaft seals are critical for preventing oil leaks from the front and rear of the engine. These seals are typically installed in the timing cover and rear main seal housing. Before installing new seals, inspect the seal surfaces on the crankshaft for any wear or damage. If wear grooves are present, you may need to use a seal installation tool that positions the new seal slightly differently to avoid the worn area. Lightly lubricate the new seals with engine oil or grease before installation. Use appropriate seal installation tools to press the seals squarely into their housings, ensuring they are seated fully and evenly. Improper seal installation is a common cause of oil leaks after engine reassembly, so take your time and ensure proper installation. Once the seals are installed, proceed with the final assembly of the engine, including installing the timing components, pistons, cylinder head, and oil pan. Pay close attention to all torque specifications and assembly procedures outlined in the engine service manual. Using new gaskets and seals throughout the engine reassembly process is highly recommended to prevent future leaks. Attention to detail in these final assembly stages is just as important as the crankshaft installation itself in ensuring a reliable and leak-free engine.
Post-Installation Vigilance: Initial Start-Up and Ongoing Monitoring
The moment of truth arrives with the initial engine start-up after crankshaft installation. This is a critical period to monitor for any signs of problems. Before starting the engine for the first time, ensure that all fluids are filled to the correct levels, including engine oil and coolant. Prime the oil system by cranking the engine briefly with the ignition disabled. This builds oil pressure before the engine actually starts, further minimizing initial wear. When you first start the engine, listen carefully for any unusual noises, such as knocking, ticking, or squealing. These noises could indicate problems with the crankshaft installation or other engine components. Monitor the oil pressure gauge closely; it should rise to the normal operating range shortly after start-up. Check for any oil leaks around the crankshaft seals and other engine areas. Allow the engine to run at idle for a period to allow components to break in and to monitor for any issues. After the initial start-up, regular maintenance and monitoring are crucial for long-term engine health. Follow the manufacturer's recommended maintenance schedule for oil changes and other services. Periodically check for oil leaks and unusual engine noises. Proactive maintenance and early detection of any issues are key to maximizing engine lifespan and preventing future crankshaft-related problems. Have you ever considered how much preventative maintenance can actually save you in the long run? It's a significant factor in engine longevity.
Proper crankshaft installation is a meticulous process that demands attention to detail at every step. From thorough preparation and precise bearing selection to careful placement, torqueing, and post-installation checks, each stage plays a vital role in ensuring engine reliability and preventing future problems. By diligently following these step-by-step guidelines, you can significantly reduce the risk of crankshaft-related issues and contribute to the long-term health and performance of your engine. Our company understands the critical importance of precision engine work, and we offer a range of high-quality engine components and tools designed to assist in proper crankshaft installation and overall engine maintenance. From precision bearings and assembly lubricants to torque wrenches and seal installation tools, our products are engineered to meet the demands of professional mechanics and dedicated enthusiasts alike, helping to ensure successful and trouble-free engine builds. Choosing the right components and following best practices, as outlined in this guide, are investments in the future reliability and performance of your engine, saving you time, money, and frustration in the long run. Remember, a properly installed crankshaft is the foundation of a healthy and powerful engine, and taking the time to do it right is always worth the effort.
For more detailed information, please visit our official website: Crankshaft Installation