")
Welcome to this comprehensive guide focused entirely on the critical task of measuring crankshaft deflection. This procedure is absolutely fundamental for assessing the health and alignment of large reciprocating engines, particularly in marine propulsion, power generation, and industrial applications. Understanding and correctly performing crankshaft deflection measurements can mean the difference between smooth, reliable operation and costly, potentially catastrophic engine failure. Crankshaft deflection, in essence, refers to the slight bending or flexing of the crankshaft between its main bearing supports as it rotates. While a minuscule amount of flex is expected, excessive deflection is a clear indicator of underlying problems, such as main bearing wear, bearing housing deformation, crankshaft misalignment, or even issues with the engine foundation or bedplate. Ignoring these measurements or performing them incorrectly can lead to severe consequences, including fatigue cracks in the crankshaft webs or journals, accelerated bearing wear, increased frictional losses, and ultimately, a breakdown. Therefore, mastering the step-by-step process for accurate measurement is not just good practice; it's an essential skill for maintenance engineers and technicians responsible for these high-value assets. This guide aims to provide a detailed, practical walkthrough of the entire process, from understanding the basics to interpreting the results.
Understanding Crankshaft Deflection: Why Measurement is Crucial
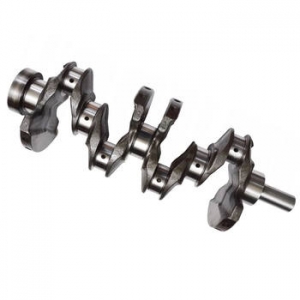
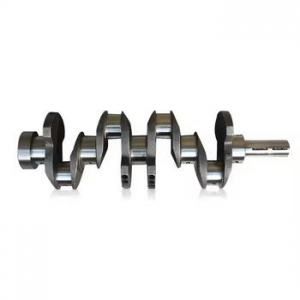
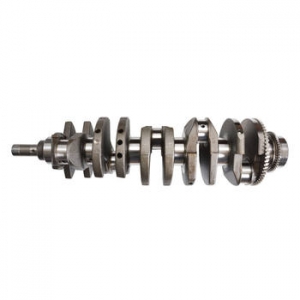
So, what exactly is crankshaft deflection, and why is its measurement so vitally important? Imagine the crankshaft as the backbone of the engine. As immense combustion forces push down on the pistons and connecting rods, these forces are transferred to the crankshaft, causing it to rotate and deliver power. Simultaneously, these forces, along with the crankshaft's own weight and rotational dynamics, cause it to bend slightly between the main bearings that support it. This bending is the crankshaft deflection. It's a dynamic measurement, typically taken between the crank webs adjacent to each main journal. Frankly speaking, a perfectly rigid crankshaft doesn't exist in the real world; some minor flex is unavoidable and designed for. However, the *amount* of deflection is what matters. Excessive deflection signals that something is amiss within the engine's lower end geometry. The most common culprit is uneven main bearing wear, causing the crankshaft journals to sit at slightly different heights. Other causes include misalignment between the engine and driven machinery (like a generator or gearbox), distortion of the engine bedplate or foundation (especially common in marine applications due to hull flexing), loose main bearing cap bolts, or even damage from a previous component failure. Measuring deflection allows us to 'see' the alignment status of the crankshaft within its bearings without major disassembly. It serves as a critical diagnostic tool, helping to pinpoint developing problems before they escalate into major failures. Regular, accurate measurements form the cornerstone of predictive maintenance programs for large engines, allowing for planned interventions rather than reactive, emergency repairs. Have you ever wondered how engineers predict bearing failure? This is one key method.
Essential Tools for Measuring Crankshaft Deflection
To accurately measure crankshaft deflection, having the right tools is non-negotiable. The primary instrument for this task is the crankshaft deflection gauge, sometimes called a deflection indicator or dial gauge assembly. This specialized tool consists of a sensitive dial indicator, typically measuring in increments of 0.01 mm or 0.0005 inches, mounted on an adjustable frame or rod. The frame is designed to span between the two inner faces of the crank webs, adjacent to the crankpin. It usually features pointed or rounded contact points to ensure consistent seating in designated punch marks or on clean, flat surfaces of the webs. It's absolutely crucial that this gauge is calibrated and handled with care, as it's a precision instrument. Alongside the gauge itself, you'll need a means to slowly and precisely rotate the engine crankshaft. This is typically achieved using the engine's integrated turning gear (or barring gear), either electric, hydraulic, or manual. For manual turning, a suitable barring lever will be required. Safety is paramount here; always ensure proper lockout/tagout procedures are followed before engaging any turning mechanism. You will also need comprehensive recording sheets or software to meticulously log the readings for each cylinder at various crank positions. Finally, good lighting (like a reliable inspection lamp), cleaning supplies (rags, solvent) to prepare the measurement surfaces, and potentially feeler gauges (if checking bearing clearances simultaneously) complete the essential toolkit. Using high-quality, well-maintained, and properly calibrated tools is fundamental; in my experience, faulty or improperly used tools are a major source of erroneous readings, leading to incorrect diagnoses. Investing in reliable equipment pays dividends in the long run.
Preparing the Engine for Accurate Deflection Measurement
Proper preparation is arguably as important as the measurement technique itself when seeking reliable crankshaft deflection readings. Hasty or inadequate preparation can easily introduce errors that render the entire process useless, or worse, misleading. First and foremost, the engine's thermal condition must be stable. Ideally, measurements should be taken when the engine is cold, meaning it has been shut down long enough to reach ambient temperature, or at a known, stable operating temperature if specified by the manufacturer or maintenance protocol. Measuring a cooling engine will yield inconsistent results due to thermal contraction. Record the engine temperature alongside the readings. Secondly, ensure the vessel (if marine) or the equipment base is stable and not subject to movement, rolling, or vibration during the measurement process. Any external movement can disturb the gauge reading. Access is key; open the necessary crankcase inspection doors or covers to gain clear and safe access to each crank throw. Before inserting the gauge, the contact points on the inner faces of the crank webs must be meticulously cleaned. Remove all oil, grease, sludge, and debris using appropriate solvents and clean rags. Any residue can prevent the gauge from seating correctly and affect the readings. Ensure the designated punch marks (if present) are clean and clear. Verify that the engine turning gear is operational and that all safety interlocks and procedures (like lockout/tagout) are strictly followed. Check the engine's lubricating oil level; it should ideally be at the normal operating level. To be honest, skipping any of these preparation steps significantly increases the risk of obtaining inaccurate and unreliable deflection data, potentially masking a serious issue or indicating a problem that doesn't exist.
The Step-by-Step Guide to Measuring Crankshaft Deflection
With the engine prepared and the right tools at hand, we can now delve into the core procedure: the step-by-step measurement of crankshaft deflection. This process requires patience, precision, and consistency. It involves placing the gauge, rotating the crankshaft through specific angles, and carefully recording the readings at each point. Remember, accuracy is paramount throughout these steps.
Positioning the Dial Gauge
The first crucial action is correctly positioning the crankshaft deflection gauge. Carefully insert the gauge between the designated points on the inner faces of the crank webs for the cylinder being measured. These points are usually specified by the engine manufacturer, often marked with small punch marks, or should be consistently chosen flat surfaces near the vertical centerline of the webs, slightly away from the crankpin fillets and oil holes. The gauge must be seated firmly and squarely, ensuring both contact points have solid purchase. Adjust the length of the gauge rod so that the dial indicator has sufficient travel in both positive and negative directions and is under slight initial compression (preload). Gently tap the gauge frame to ensure it's properly seated. The next critical step is typically performed with the crankpin near Bottom Dead Center (BDC). Rotate the engine slowly until the crankpin is just past BDC (often around 15-20 degrees past BDC, as specified by the maker, to avoid the 'swinging' point right at the bottom). At this stable position, carefully rotate the dial face of the indicator to align the zero mark with the needle. This sets the baseline for all subsequent readings for that specific cylinder. Consistency in placement and zeroing across all cylinders is absolutely essential for comparable results.
Taking Readings at Different Crank Angles
Once the gauge is securely positioned and zeroed near BDC, the measurement sequence begins. Using the engine turning gear, rotate the crankshaft *slowly and steadily* in the normal direction of engine rotation. The standard sequence involves taking readings at specific angular positions. While the exact positions can vary slightly based on manufacturer recommendations, a very common sequence is:
- Position 1 (Near BDC / 'A'): The initial zero setting position. Record '0'.
- Position 2 (Port / 'B'): Rotate the engine approximately 90 degrees towards the Port side (or typically the 'Camshaft Side' or 'Exhaust Side' - check engine specifics). Allow the gauge reading to stabilize, then record the value (it might be positive or negative).
- Position 3 (TDC / 'C'): Continue rotating slowly to Top Dead Center (TDC). Again, pause, let the reading stabilize, and record the value.
- Position 4 (Starboard / 'D'): Continue rotating approximately 90 degrees past TDC towards the Starboard side (or 'Intake Side'). Pause, stabilize, record.
- Position 5 (Near BDC / 'E' Check): Continue rotating back towards the initial BDC position (or slightly past it, matching the starting point). Pause, stabilize, and record this final reading.
Recording and Plotting the Deflection Data
Meticulous recording is just as vital as accurate measurement. Use a dedicated crankshaft deflection report form or a digital equivalent. For each cylinder, clearly log the following information: Cylinder Number, Date, Engine Running Hours, Engine Temperature (ambient or operating), and the dial gauge readings obtained at each position (e.g., A=0, B=+5, C=+12, D=+3, E=-1). Note readings with their correct sign (+ or -) relative to the initial zero setting. The most critical value often derived from these readings is the vertical deflection, commonly calculated as the reading at TDC ('C') minus the average of the readings near BDC ('A' and 'E'), although simpler calculations like just the TDC reading or the algebraic difference between the maximum positive and maximum negative readings are also widely used depending on the manufacturer's specified method. Ensure you know which calculation method is required for comparison against limits. Plotting the deflection readings graphically for each cylinder can be incredibly insightful. A simple polar graph or even a bar chart showing the 'C' reading (TDC) for each cylinder can visually highlight misalignment trends, such as a sagging middle bearing (high positive deflection in central cylinders) or misalignment at the flywheel end. This visual representation often makes it much easier to interpret the overall condition of the crankshaft alignment compared to just looking at tables of numbers. Why is this approach so effective? Because it translates raw data into an understandable picture of the crankshaft's shape.
Interpreting Crankshaft Deflection Measurement Results
Obtaining accurate readings is only half the battle; interpreting them correctly is where the real value lies. The primary step in interpretation is comparing the measured deflection values – typically the maximum algebraic difference or the calculated vertical deflection for each cylinder – against the allowable limits specified by the engine manufacturer. These limits are crucial and vary significantly depending on the engine size, design, and application. Never assume limits from one engine apply to another. Values well within the manufacturer's tolerances generally indicate satisfactory alignment and bearing conditions. Readings approaching the limits serve as a warning, suggesting increased monitoring frequency or investigation during the next scheduled maintenance window. Readings exceeding the manufacturer's limits demand immediate attention and further investigation. It’s not just the absolute values that matter, but also the pattern of deflection across all cylinders. For example, consistently high positive readings (webs spreading apart at TDC) in the middle cylinders might indicate wear in the central main bearings or a sagging engine block/bedplate. Conversely, high negative readings (webs closing in at TDC) could point towards issues like excessively tight bearings or humping of the bedplate. Trend analysis is also extremely powerful. Comparing the current set of readings with historical data from previous measurements on the same engine allows for the identification of deteriorating conditions over time. A gradual increase in deflection, even if still within limits, warrants closer observation. Is a sudden jump in deflection readings, even if below the absolute limit, more concerning than a consistently borderline reading? In my experience, sudden changes often signal a more acute problem requiring prompt investigation. Understanding these nuances is key to effective interpretation.
Common Mistakes to Avoid During Crankshaft Deflection Measurement
Despite being a standard procedure, several common mistakes can compromise the accuracy and reliability of crankshaft deflection measurements. Awareness of these pitfalls is the first step towards avoiding them. One frequent error is improper gauge placement or seating. If the gauge's contact points are not on clean, flat, designated surfaces or if they slip during crankshaft rotation, the readings will be incorrect. Always ensure the gauge is stable and recheck the final reading near BDC to confirm stability. Another issue is failing to properly clean the contact surfaces on the crank webs; dirt or debris will introduce significant errors. Rushing the process is another common mistake; allow sufficient time for the gauge reading to stabilize at each measurement position before recording the value. Reading the dial indicator incorrectly, due to parallax error (viewing the needle from an angle) or misinterpreting the scale divisions, can also occur. Always view the dial perpendicularly. Using an uncalibrated or damaged gauge is a critical error – ensure instruments are regularly checked and calibrated. Ignoring the engine's thermal state and measuring while it's rapidly cooling or heating will lead to inconsistent results. Ensure thermal stability. Furthermore, calculation errors when determining the final deflection value or misinterpreting the required calculation method (e.g., vertical deflection vs. algebraic difference) can lead to wrong conclusions. Finally, inadequate documentation – failing to record all necessary information like date, hours, temperature, and readings clearly – hinders future trend analysis. Frankly speaking, double-checking each step, from preparation to recording, is essential for trustworthy results.
Addressing Crankshaft Deflection Issues: Solutions and Prevention
Discovering crankshaft deflection readings that exceed the manufacturer's limits necessitates prompt action to diagnose the root cause and implement corrective measures. Ignoring excessive deflection is simply not an option, given the risk of severe engine damage. The first step is usually a more thorough investigation, which might involve checking main bearing clearances using feeler gauges or lead wire (plastigauge), inspecting the condition of main bearing shells for signs of uneven wear, wiping patterns, or damage, and examining the bearing housings and caps for fretting or distortion. If bearing wear is identified as the cause, replacing the affected bearing shells might resolve the issue. Sometimes, using selectively thicker or thinner bearing shells can help correct minor alignment problems, although this requires careful calculation and understanding. If the problem stems from misalignment between the engine and the driven equipment, a full alignment check (using laser alignment tools or traditional methods) and subsequent realignment are necessary. In cases where the engine bedplate or foundation is suspected of distortion (common in marine engines due to hull flexing or after grounding incidents), more extensive checks involving optical or laser measurements of the bedplate itself may be required, potentially leading to structural repairs or re-chocking the engine. For preventative measures, adhering to a regular schedule of deflection measurements is key. Addressing minor deviations early can prevent them from escalating. Maintaining proper lubrication, ensuring correct bearing clearances during overhauls, and periodically verifying engine mounting and alignment all contribute to preventing excessive deflection. Our company recognizes the importance of engine health diagnostics, and while we focus on [mention related product/service area briefly, e.g., precision measurement tools or condition monitoring sensors], understanding procedures like deflection measurement helps ensure overall machinery reliability, complementing the insights gained from our specialized solutions.
Conclusion: Mastering the Crankshaft Deflection Measurement Process
In conclusion, the ability to accurately measure and interpret crankshaft deflection is a cornerstone of effective large engine maintenance and diagnostics. This step-by-step guide has outlined the essential elements, from understanding the fundamental concept of deflection and its importance, through the necessary tools and meticulous preparation, to the detailed procedure for taking readings and the critical task of interpreting the results. We've also highlighted common pitfalls to avoid ensuring the data collected is reliable and actionable. Remember, crankshaft deflection measurement is more than just a routine task; it's a powerful diagnostic window into the internal alignment and condition of the engine's most critical component. Consistently applying the correct procedures, using calibrated tools, and carefully analyzing the readings against manufacturer limits and historical trends enables engineers and technicians to identify potential problems proactively. Addressing these issues early, guided by accurate deflection data, prevents catastrophic failures, minimizes downtime, reduces operational costs, and significantly extends the lifespan of valuable engine assets. Mastering this guide on how to measure crankshaft deflection empowers you to contribute directly to the reliability and efficiency of the machinery under your care.
For more detailed information, please visit our official website: Measure Crankshaft Deflection